3rd Party Setup
Facebook Login
If you want facebook login in your project then create your own app form https://developers.facebook.com/apps
Configure your app form Settings->Basic with your own Display name, Contact email , Privacy Policy URL, Terms of Service URL, App icon
Add your platform (
web/android/ios) with click Add platform and configure your app.Add Facebook Login form products section.
To Configuration setting in App->Facebook Login->Settings->Client OAuth settings enable Client OAuth login, Web OAuth login, Enforce HTTPS, Use Strict Mode for redirect URIs, Login with the JavaScript SDK.
Also, you need to add yor Allowed Domains for the JavaScript SDK (ex- https://6ammart-web.6amtech.com)
To get profile information you need to request access in App Review->Permissions and features get access for public_profile
Now open your flutter project go to
<project>/lib/main.dartand replace with your facebook appIDFor android go to
<project>/android/app/src/main/res/values/string.xmland set value./android/app/src/main/res/values/<?xml version="1.0" encoding="utf-8"?>
<resources>
<string name="app_name">6ammart</string>
<string name="facebook_app_id">YOUR_APP_ID</string>
<string name="fb_login_protocol_scheme">fb_YOUR_APP_ID</string>
<string name="facebook_client_token">Go_to_your_fb_app->Settings->Advance->Security->Client token</string>
</resources>For ios go to
ios/Runner/Info.plistand set valueios/Runner/Info.plist<array>
<dict>
<key>CFBundleURLSchemes</key>
<array>
<string>fb_your_app_id</string>
</array>
</dict>
<array>
<key>FacebookAppID</key>
<string>app_id</string>
<key>FacebookClientToken</key>
<string>
Go_to_your_fb_app->Settings->Advance->Security->Client token
</string>
<key>FacebookDisplayName</key>
<string>name</string>
For web go to
<project>/lib/main.dartset your appID./lib/main.dartawait FacebookAuth.instance.webAndDesktopInitialize(
appId: "YOUR_FB_APP_ID",
cookie: true,
xfbml: true,
version: "v13.0",
);
tip
Recommended tutorial is below 👇
Google Login
If you want to enable your Google login then go to https://console.firebase.google.com and open your Project->Authentication->Sign-in method-> Add new Provider->Additional providers then select Google and enable finlay Save.
For android, you need to set fingerprint in Project->Project settings-> Android apps-> add fingerprint then enter your SHA1 and SHA256 and Save.
After published on playscape you need to add your SHA1 and SHA256 form App integrity.
To found App integrity App signing, go to google play console
Project-> Release-> Setup-> App integrity-> App signingDownload your google-service and Copy that file and paste it under
<project>/android/app/folder.Go to https://console.cloud.google.com and select your firebase project, you can find your Client id in, APIs & Services-> Credentials -> OAuth 2.0 Client IDs then select Web Client and finally copy the Client ID.
For ios go to
<project>/ios/Runner/Info.plistand add your Client ID/ios/Runner/Info.plist<dict>
<key>CFBundleTypeRole</key>
<string>Editor</string>
<key>CFBundleURLSchemes</key>
<array>
<string>YOUR_CLIENT_ID</string>
</array>
</dict>For web go to
<project>/web/index.htmland set your CLIENT_ID/web/index.html<meta name="google-signin-client_id" content="YOUR_CLIENT_ID">
tip
Recommended tutorial is below 👇
Apple Login
To configure Apple Login Sign-up follow the steps mentioned below -
Step 1: Find out Team ID
- Visit the Apple Developer page.
- Go to Account and find out Membership details section. There you will find TeamID.

Step 2: Create or Use App ID
info
If you already have an App ID that you want to use for Apple Sign-In, you can skip creating a new one and proceed to the next step.
- Go to the Identifiers list here.
- Click the Plus icon besides Identifiers, and then select App IDs and continue
- Select type App and continue.
- Provide a brief description and a Bundle ID (the same one used for your app). This identifier will serve as the Client ID for Apple Sign-In.
- In Capabilities, select the required options like Push Notifications, Sign In with Apple, and Associated Domains (if you want QR-Scan feature).
- Click Continue and proceed.
Step 3: Create Service ID
- Go again to the Identifiers list here.
- Click the Plus icon besides Identifiers, and then select Service IDs and continue
- Add a description and an identifier for your service, then click Continue
- Download the file labeled as AuthKey_example.p8. This is the Service File, and the segment "example" within the file name is indicative of the KeyID. To illustrate, if your file is titled AuthKey_XXXXXXXXXX.p8, then XXXXXXXXXX signifies the KeyID.
Step 4: Submit Data in Admin Panel
Go to the Admin panel.
Navigate to 3rd Party > Social Login > Apple Login setup your data.
Use the following information:
- Client ID: The Bundle ID you previously specified.
- Team ID: Obtained from the Apple Developer page.
- Key ID: KeyID from the AuthKey_example.p8 file name.
- Service File: Downloaded AuthKey_example.p8 file.
Save and enable Apple Login status.
By following these steps, you can successfully set up and implement Apple Sign-In in your Project.
tip
Recommended tutorial is below 👇
Configure WebSocket Server
Starting the WebSocket Server
Once you have configured your WebSocket apps, you can start the Laravel WebSocket server by issuing the artisan command:
php artisan websockets:serve
Using a different port
The default port of the Laravel WebSocket server is 6001. You may pass a different port to the command using the --port option.
php artisan websockets:serve --port=3030
This will start listening on port 3030.
Restricting the listening host
By default, the Laravel WebSocket server will listen on 0.0.0.0 and will allow incoming connections from all networks. If you want to restrict this, you can start the server with a --host option, followed by an IP.
For example, by using 127.0.0.1, you will only allow WebSocket connections from localhost.
php artisan websockets:serve --host=127.0.0.1
Keeping the socket server running with supervisord
The websockets:serve daemon needs to always be running in order to accept connections. This is a prime use case for supervisor, a task runner on Linux.
First, make sure supervisor is installed.
# On Debian / Ubuntu
apt install supervisor

# On Red Hat / CentOS
yum install supervisor
systemctl enable supervisord
Once installed, add a new process that supervisor needs to keep running. You place your configurations in the /etc/supervisor/conf.d (Debian/Ubuntu) or /etc/supervisord.d (Red Hat/CentOS) directory.
Within that directory, create a new file called websockets.conf.
[program:websockets]
command=/usr/bin/php /home/laravel-echo/laravel-websockets/artisan websockets:serve
numprocs=1
autostart=true
autorestart=true
user=laravel-echo
Once created, instruct supervisor to reload its configuration files (without impacting the already running supervisor jobs).
supervisorctl update
supervisorctl start websockets
Your echo server should now be running (you can verify this with supervisorctl status). If it were to crash, supervisor will automatically restart it.
Please note that, by default, supervisor will force a maximum number of open files onto all the processes that it manages. This is configured by the minfds parameter in supervisord.conf.
If you want to increase the maximum number of open files, you may do so in /etc/supervisor/supervisord.conf (Debian/Ubuntu) or /etc/supervisord.conf (Red Hat/CentOS):
[supervisord]
minfds=10240; (min. avail startup file descriptors;default 1024)
After changing this setting, you'll need to restart the supervisor process (which in turn will restart all your processes that it manages).
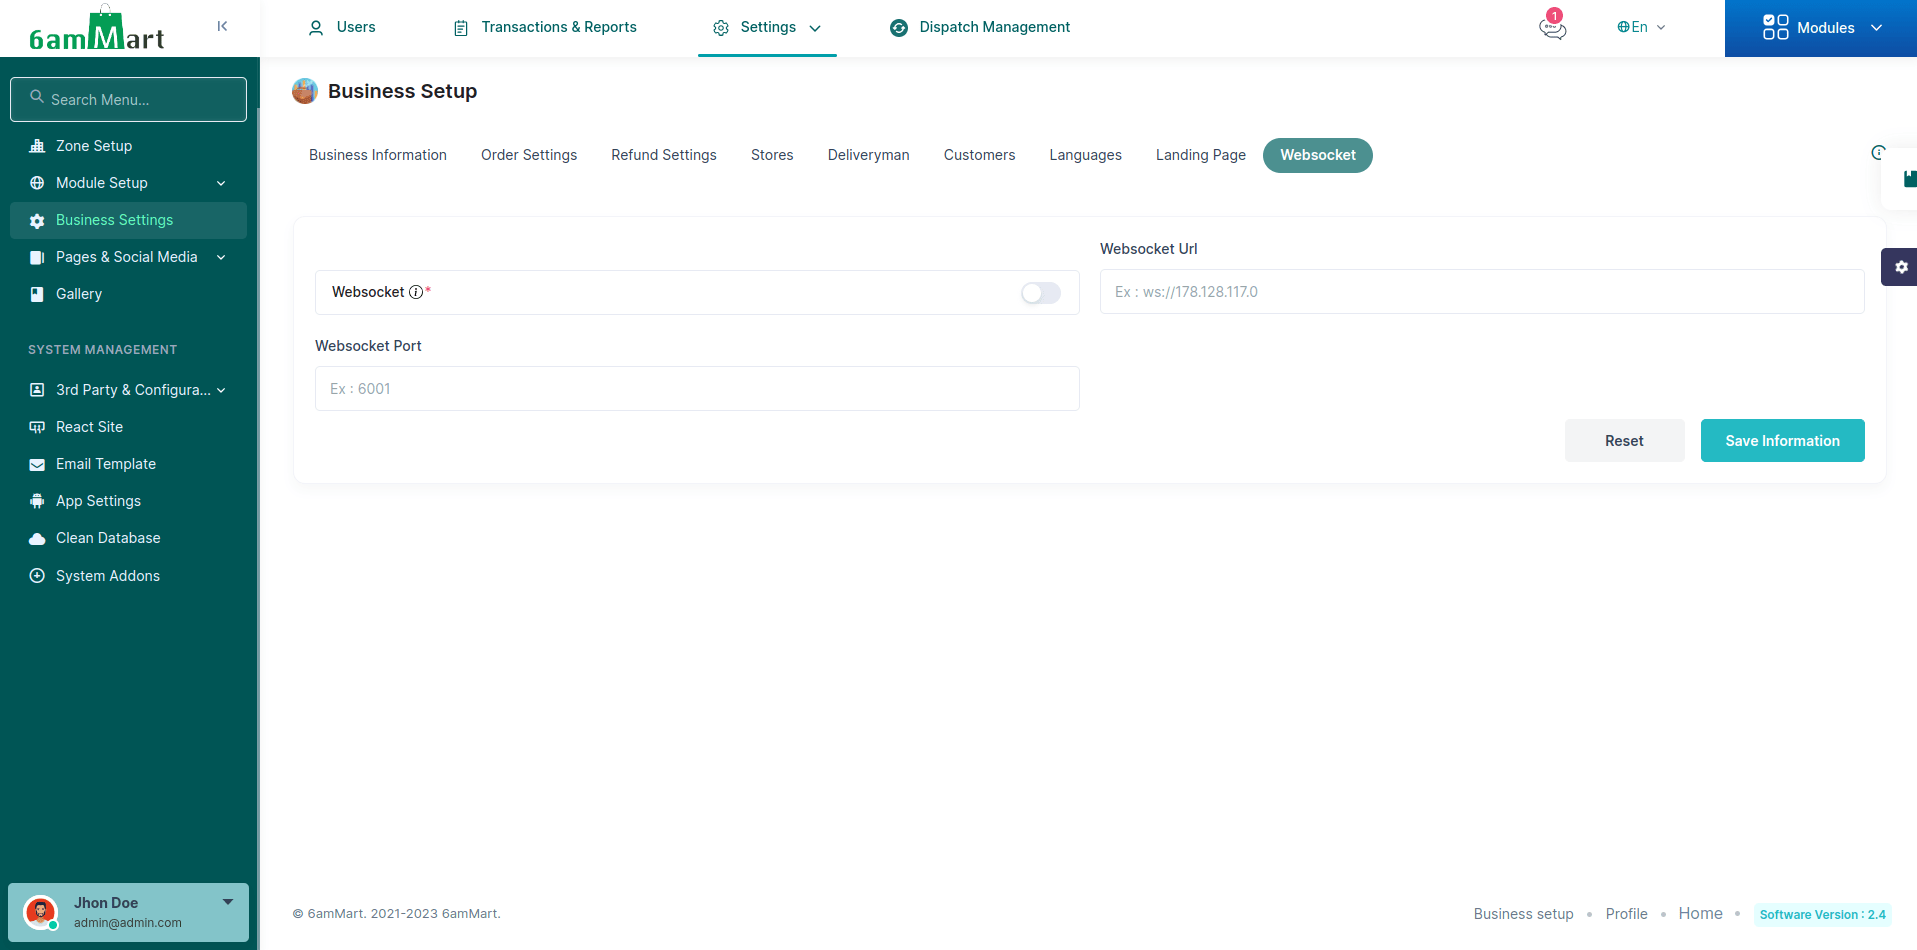
Configuration in Admin Panel
After configuring all the settings above, turn on the Websocket and update the Websocket URL and Websocket Port.